Follow the steps below to get started. First we’ll start by creating a Series. This is the where all of your comics under that series title will land (this is especially handy if you have more than one title). With the rise of mobile readers we highly recommend you take advantage of both mobile and traditional layouts.
1) Log in to ComicIndie.com with the credentials you created upon registration.

2) Go back to the “Profile” menu, and select “My Comics.”

3) Click on “My Series” on the left-hand menu.

4) Click on “Add New” at the top.

5) Enter the title and description of your comic.

6) From the right-hand side, under the “Series Thumbnail” section, upload a thumbnail image for your comic title.

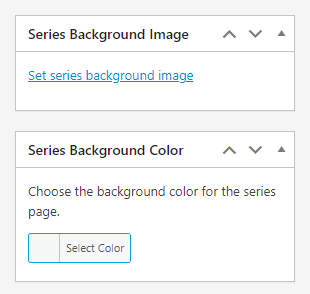
7) OPTIONAL – from the right-hand side, either upload an image for the page background of your series landing page or set a background color.

8) Click “Publish”. If you make any changes after publishing, this will say “Update”.

Now we get to the meat and potatoes. Let’s upload your comic and associate it with the Series. Each upload here is treated as a page from a comic book issue.
9) Click on “My Comics” on the left-hand menu.

10) Click on “Add New” at the top.

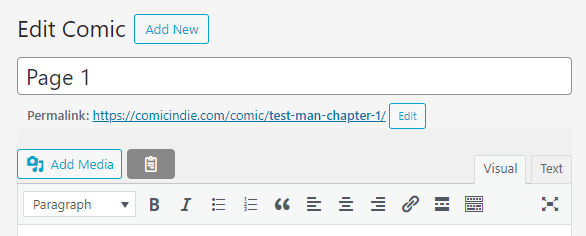
11) Enter the title of the comic directly under “Edit Comic”. You can simply label it as the page number for the series if there are multiple pages (e.g. “Page 1”).

For Mobile Layouts
If you are planning to use the mobile layout proceed. If you don’t have sliced images for your comic page, skip this step.
12) Click “Add Media” (directly under the title) to select all of the sliced image(s) for the comic page (you can upload one by one or all at once).
NOTE: The format should be PNG or JPEG with the dimensions for each image –at most– should be 800px by 1280px (this will practically take up the whole page, so ideally the image should be something like 400px by 400px).

13) Center your media if needed.
14) Click the “Publish” button on the right-hand side. This will say “Update” if any changes are made after publishing.

For Traditional Page Layouts
These are traditional full page comic layouts such as from a comic book. If you are uploading your comics using this way, look under the “Desktop Comic Editor” to upload a single page.
15) Here you’ll click on “Add Media” to add a single image for your comic page.
NOTE: The format should be PNG or JPEG with the ideal dimensions for the image at or close to 1280 by 800px.

16) Center your media by clicking on the image and clicking on the center align button.

17) On the right-hand side, in the Series section, select the series you created in STEPS 3-8 in the dropdown.

18) On the right-hand side, click on “Set featured image” under the “Comic Thumbnail” section to upload a small thumbnail for your comic.

19) Click the “Publish” button on the right-hand side. This will say “Update” if any changes are made after publishing.

ADD A DONATION BUTTON
20) If you would like to add a donation button to your comic page, click here to follow the instructions.